Full story here
Setup Firebase
Create the project on the [Firebase console](https://console.firebase.google.com/) page

On the project is set up, install Firebase CLI on your machine:
$ npm install -g firebase-toolsSign in to Google to have access to your Firebase account.
$ firebase loginInitiate your Firebase project locally and select Hosting, then folow the rest of the wizard and select www/ folder to be the public directory.
$ firebase init

? Which Firebase CLI features do you want to set up for this folder?
 ◯ Database: Deploy Firebase Realtime Database Rules
 ◯ Firestore: Deploy rules and create indexes for Firestore
 ◯ Functions: Configure and deploy Cloud Functions
❯◉ Hosting: Configure and deploy Firebase Hosting sites
 ◯ Storage: Deploy Cloud Storage security rules
Now using the following command will deploy whatever files are inside www/ folder.
$ firebase deploy --only hostingWe are ready to automate this into Github Actions!
Github Actions
Fast CI/CD for any OS, any language, and any cloud
GitHub Actions makes it easier to automate how you build, test, and deploy your projects on any platform, including Linux, macOS, and Windows.
Run your workflows (also called pipelines in other CI platforms) in a container or in a virtual machine.
Create a new workflow
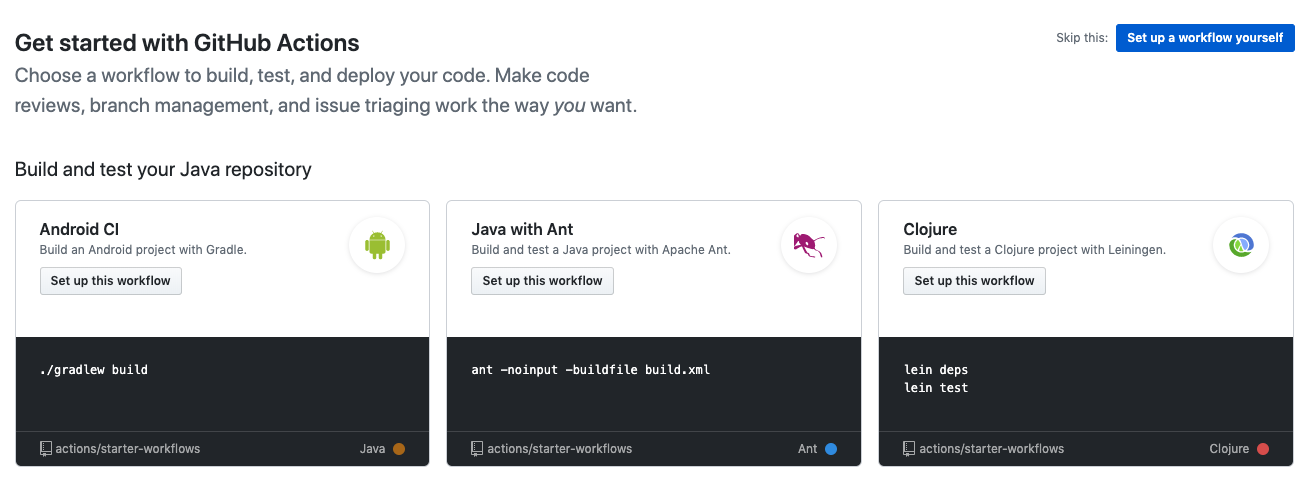
To create a new workflow, open your github repository to the “Actions” tab.

on this screen you will get a lot of already setup workflows that you could start from. For the purpose of this blog post, we will set up our own workflow (click on the “Set up a workflow yourself” button).
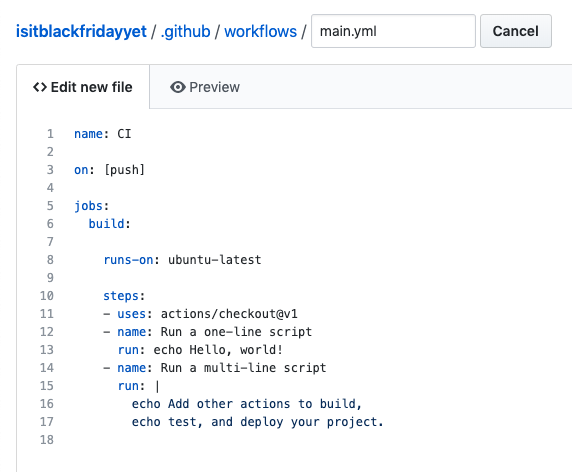
Select a new workflow name and erase the content of the default action
What we want here is to trigger this action when code is merged into master branch. If you follow the develop/master branching model
, merging into master usually mean that the code is stable and ready to go to production.
name: CI

on:
  push:
    branches:
      - master
Now we want to build our PWA!
Build job
Actions workflows can have many jobs. Our first job will be to build our PWA.
Start by creating a new job that runs on the latest ubuntu image.
jobs:
  build:
    name: Build
    runs-on: ubuntu-latest
Jobs can have many steps.
First step, we want to checkout the master branch.
    steps:
      - name: Checkout Repo
        uses: actions/checkout@master
Then we want to install the dependencies.
      - name: Install Dependencies
        run: npm ci
Then build our app (npm run build npm script when using StencilJS)
      - name: Build
        run: npm run build
To finish we want to save the output (www/ folder with StencilJS) for further usage.
      - name: Archive Production Artifact
        uses: actions/upload-artifact@master
        with:
          name: www
          path: www
The entire file can be found here
Deploy job
Now that we have the distribution files created on Github Actions, we want to deploy them! To be able to run firebase deploy --only hosting command on another machine than your we need to use a token that you will get running the following command on your machine:
$ firebase login:ciGet the token and open the Settings > secrets page.
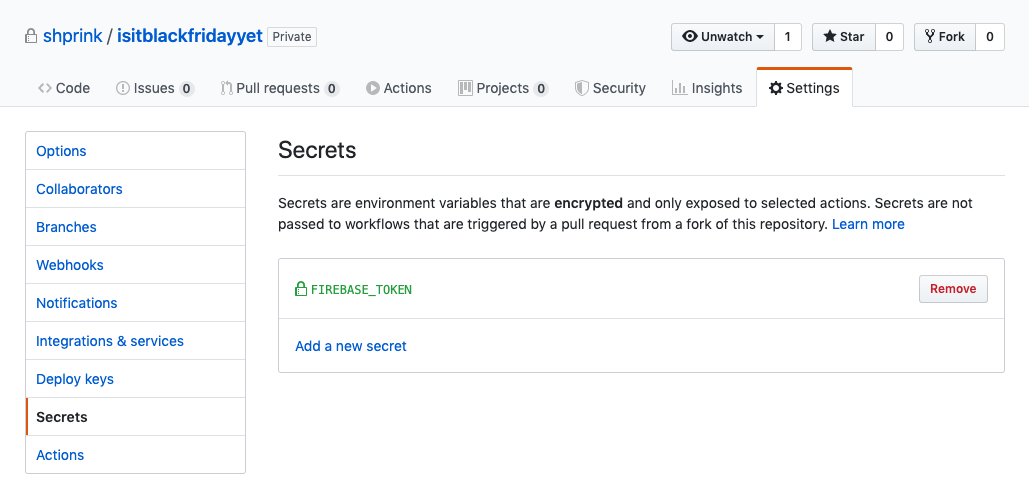
Create a new secret with FIREBASE_TOKEN name and the token as value. Now you can refer to this token using ${{ secrets.FIREBASE_TOKEN }} in any of your actions workflow!
Let’s create a new job named deploy that also runs on the latest Ubuntu and uses our repository.
  deploy:
    name: Deploy
    needs: build
    runs-on: ubuntu-latest
    steps:
      - name: Checkout Repo
        uses: actions/checkout@master
Now we can get the www/ folder that we saved on the previous job.
      - name: Download Artifact
        uses: actions/download-artifact@master
        with:
          name: www
And finally we can deploy using w9jds/firebase-action workflow with our FIREBASE_TOKEN.
      - name: Deploy to Firebase
        uses: w9jds/firebase-action@master
        with:
          args: deploy --only hosting
        env:
          FIREBASE_TOKEN: ${{ secrets.FIREBASE_TOKEN }}
If everything is setup correctly, your app should be deployed on <Firebase-project-id>.web.app address.
The entire file can be found here
Bonus: Buy and use your own domain
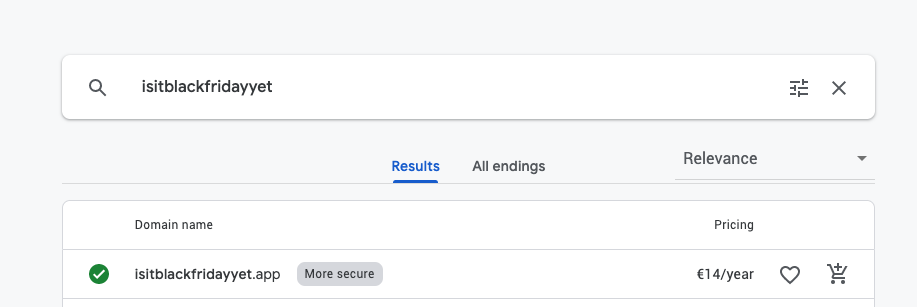
Go to domains.google or another domain provider and search for your domain. Add it to the cart and check out!
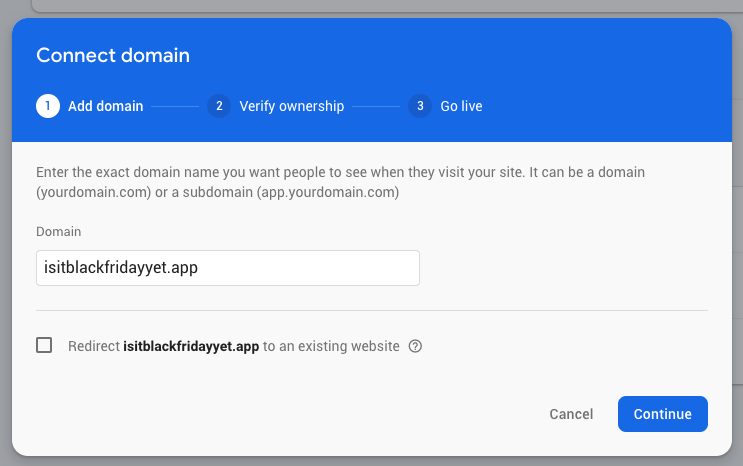
Go to Firebase, open the “hosting” menu and click on “connect domain” button. Enter your domain name and click “continue”
The values you will see are “A” records that you will need to add to the DNS so it will be able to resolve the routing from your domain name to Firebase IP address.
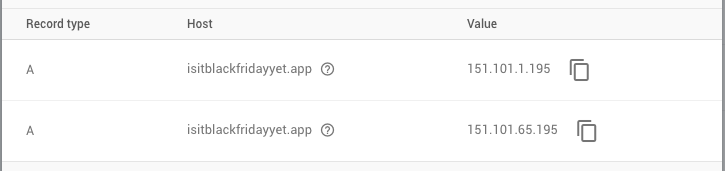
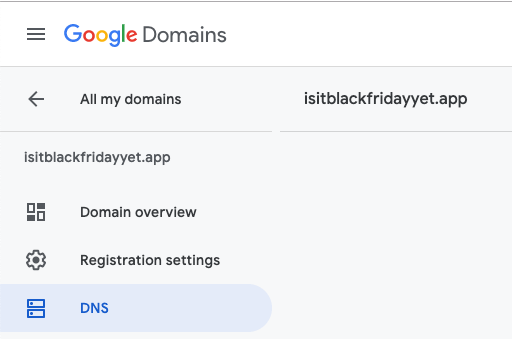
Copy those values, go to your domain’s DNS menu
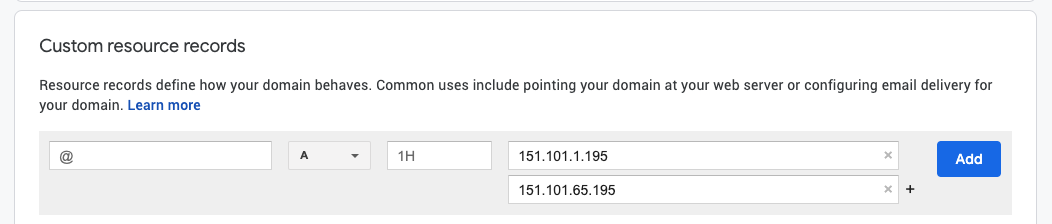
Past the values under “custom resource records”
Now you just need to wait up to 48 hours to be able to enjoy your PWA using your brand new domain name!